How to Choose Indoor Playground Structures in 2026?
Choosing Indoor Playground Structures in 2026 is not just a matter of picking bright colors or the tallest slide. A busy play space must fit its visitors, floor plan, staffing, and cleaning routine. Small details matter: a clear view across the climbing zone, enough room near a slide exit, and surfaces that are practical to maintain. The U.S. Consumer Product Safety Commission’s National Electronic Injury Surveillance System has documented more than 200,000 annual emergency-room visits for playground-related injuries among children. That figure covers playgrounds broadly, not indoor venues alone. It is a useful reminder to weigh safety alongside capacity and appearance.
The CPSC’s Public Playground Safety Handbook offers practical guidance on layout, surfacing, and equipment, while ASTM F1918 addresses soft-contained play equipment. These references can inform a shortlist, but they cannot replace a site-specific review. Dr. Stuart Brown, founder of the National Institute for Play, wrote, “The opposite of play is not work—the opposite of play is depression.” His point helps explain why a structure should invite exploration, not merely keep children occupied. Still, a good design is not automatically a good fit. A compact climbing tower may look efficient on a floor plan, yet feel crowded when families arrive together. This guide will help buyers compare age ranges, materials, accessibility, maintenance, supplier support, and total cost. Some trade-offs will remain. It is worth asking what the room will feel like on a noisy Saturday, not only how it looks in a product photo.
Use CPSC’s 200,000 Annual Public-Playground ER Visits as Risk Context
How to Choose Indoor Playground Structures in 2026?
Use CPSC’s 200,000 Annual Public-Playground ER Visits as Risk Context
The U.S. Consumer Product Safety Commission’s Public Playground Safety Handbook cites more than 200,000 emergency-room visits each year for playground-equipment injuries. This national estimate is a warning about exposure, not a forecast for indoor venues. It does not isolate indoor facilities or predict risk at a particular site. Use it to ask sharper questions: What are the fall heights? Where might children collide? Can staff see the upper platforms? Small details matter. A crowded entrance beside a slide exit can turn ordinary play into a bottleneck.
When comparing structures, match equipment to children’s ages, abilities, and expected traffic. Check that impact-attenuating surfacing covers fall zones, and ask how its performance will be inspected and maintained. CPSC guidance and ASTM F1918-21, the standard for soft contained play equipment, offer useful reference points; neither replaces a site-specific safety review. Look closely at net openings, handholds, seams, and blind corners. Ask the supplier for applicable test documentation and a maintenance schedule, then have a qualified reviewer check the layout before installation. A polished rendering is not evidence of safe circulation. I would still revisit the plan after observing real play; children rarely follow the neat paths designers imagine.
How to Choose Indoor Playground Structures in 2026? - Use CPSC’s 200,000 Annual Public-Playground ER Visits as Risk Context
| Selection factor |
Verified data or guidance |
What to look for when choosing indoor structures |
Reference |
| Injury context |
CPSC materials report more than 200,000 children treated in U.S. hospital emergency departments each year for playground-equipment-related injuries. This estimate is not limited to public playgrounds or indoor play structures. |
Use the figure as broad playground-risk context—not as an indoor-only injury count. Prioritize fall protection, age-appropriate design, and routine inspection. |
CPSC, Public Playground Safety Handbook |
| Fall-related hazards |
The CPSC handbook identifies falls as the most common cause of playground injuries and reports that they account for more than 75% of playground-related injuries. |
Compare each structure’s fall height with the impact-attenuating performance of the flooring system. Include platforms, climbers, and elevated access points in the review. |
CPSC handbook |
| Age range |
CPSC playground guidance distinguishes equipment intended for preschool-age children (2–5 years) from equipment intended for school-age children (5–12 years). |
Choose structures for the facility’s actual age group. Where younger and older children share a space, consider separate, clearly defined play zones and supervision sightlines. |
CPSC handbook |
| Clearance and use zones |
CPSC guidance generally calls for a 6-foot use zone around stationary playground equipment. Swing use zones require additional clearance; the handbook describes a zone extending twice the pivot-point height in front of and behind the swing. |
Request a dimensioned floor plan showing equipment footprints, use zones, exits, and circulation paths. Apply the guidance relevant to the equipment type and applicable local requirements. |
CPSC handbook |
| Impact-attenuating surfacing |
CPSC guidance ties surfacing performance to the equipment’s fall height. The required material depth and performance vary by surfacing type and must be maintained. |
Ask for documented test data showing that the proposed flooring is suitable for the structure’s fall height. Include installation, wear, seams, and ongoing maintenance in the decision. |
CPSC handbook |
| Applicable equipment standard |
ASTM F1487 covers public-use playground equipment. ASTM F1918 addresses soft contained play equipment. |
Identify the type of structure before evaluating standards. Request the applicable standard documentation and have the installation reviewed for the specific site and intended use. |
ASTM F1487 · ASTM F1918 |
| Inspection and maintenance |
CPSC recommends regular inspection and maintenance of playground equipment and protective surfacing; the handbook provides inspection considerations rather than one universal schedule for every facility. |
Before purchase, obtain the manufacturer’s inspection and maintenance instructions, identify replaceable components, and establish a documented site-specific inspection plan. |
CPSC handbook |
Note: The 200,000 figure is a broad annual estimate for playground-equipment-related emergency-department injuries; it should not be presented as a count limited to public playgrounds or indoor playgrounds.
Measure the Site and Plan Clearances Under ASTM F1918-21
How to Choose Indoor Playground Structures in 2026?
Measure the Site and Plan Clearances Under ASTM F1918-21
Start with the room, not the equipment brochure. Measure wall to wall, then note columns, low beams, doors, windows, and fixed furniture. Mark the proposed structure’s full footprint on the floor with tape. Add routes to exits and space for adults to supervise without blocking circulation. ASTM F1918-21 covers safety and performance for soft contained play equipment; it is not a universal room-layout chart. Confirm the structure’s required clearances and installation details with the standard and qualified design professionals. Small oversight, big headache.
The U.S. Consumer Product Safety Commission reports roughly 200,000 emergency-department-treated playground injuries annually. This figure covers playground equipment broadly, not indoor structures alone, but it underscores why access and impact areas matter. Keep entry points visible, avoid placing slides or openings beside doors, and check that children can move through the play area without crossing crowded queues. Measure again after accounting for nets, padding, and access panels. Those details can steal usable space. A floor plan can look generous on paper and still feel cramped in use. Test the layout at child height, with supervision sightlines and real circulation in mind. Cite: ASTM F1918-21; CPSC, Public Playground Safety Handbook.
How to Choose Indoor Playground Structures in 2026?
Measure the Site and Plan Clearances Under ASTM F1918-21
Use this conversion reference when recording site measurements: 0.6, 0.9, 1.2, and 1.5 meters equal approximately 1.97, 2.95, 3.94, and 4.92 feet. These are conversion examples, not ASTM-required clearances. Check the applicable standard, equipment documentation, and local requirements when planning the layout.
Match Play Features to Children’s Ages, Capacity, and Supervision
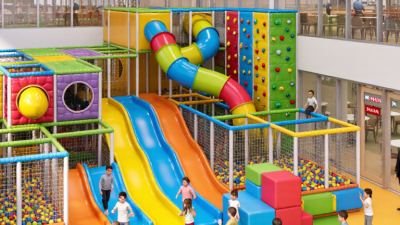
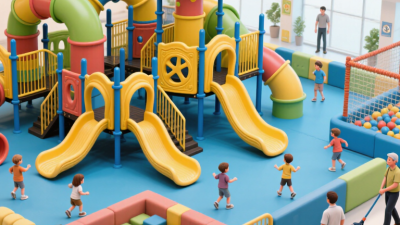
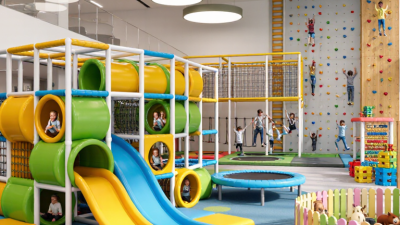
Choosing indoor playground structures in 2026 starts with the children who will use them, not the most dramatic catalog image. For toddlers, low platforms, wide steps, gentle slides, and clear sightlines matter more than height. Preschoolers often enjoy tunnels and small climbing challenges, while school-age children benefit from varied routes and harder choices. Keep age groups apart where practical. It reduces collisions.
Capacity changes the design. Estimate peak attendance, not a quiet weekday hour. A narrow crawl tunnel can create a queue; a single slide may leave children bunching at its exit. Look for multiple entry and exit points, open waiting areas, and circulation paths that do not cross active play zones. Keep exits clear. Ask the supplier for capacity assumptions and how they were calculated, then compare them with your room layout and staff coverage. Numbers can look reassuring on paper.
Supervision should shape sightlines and staff positions. From one standing point, can an adult see the slide landing, upper platforms, and quieter corners? If not, consider lower structures, transparent panels, or staffed viewing points. Match play intensity to the number and experience of attendants, and set simple rules children can follow. A feature needing constant intervention may not suit a busy session. I would still test the layout with taped floor outlines before ordering; drawings rarely show how a queue feels at 4 p.m.
Specify Impact-Attenuating Surfacing Tested to ASTM F1292
How to Choose Indoor Playground Structures in 2026?
Specify Impact-Attenuating Surfacing Tested to ASTM F1292
When comparing indoor playground structures, look beyond bright colors and climbing features. Check the equipment’s maximum fall height, then select surfacing with documented impact attenuation under ASTM F1292. This standard evaluates how a surface reduces impact forces; it does not certify the entire play area as safe. Ask for test documentation covering the exact surface type and installed thickness. A result at one thickness may not apply to a thinner installation.
The fit matters. A padded floor can look substantial yet compress differently around seams, edges, or busy landing zones. Confirm that the tested critical fall height meets or exceeds the equipment’s fall height. Ask whether the documentation reflects laboratory or field testing, and whether the finished installation matches the tested setup. Keep records for future inspections. Surface condition changes, sometimes before wear is obvious.
Tips: Inspect transitions at slide exits and climbing zones. Watch for gaps, loose edges, or compressed patches. Follow a written inspection schedule; ASTM F1292 testing cannot replace routine upkeep.
Check ADA’s 36-Inch Accessible-Route Minimum and Ongoing Inspection Needs
When comparing indoor playground structures, map the accessible route before choosing slides, climbers, or platforms. Under the ADA Standards, accessible routes generally need 36 inches of clear width, subject to specific exceptions and other applicable requirements. Treat that figure as a starting point, not a complete layout rule. Measure between finished surfaces, including padding, rails, and open doors; a wall-to-wall measurement can hide a pinch point. A 36-inch aisle may still feel tight when caregivers pass a stroller. Check turning and passing areas, entrances, ramps, and access to play components against current requirements. Keep transitions firm, stable, and slip-resistant. Details matter.
Inspection needs should shape the purchase, too. Ask how staff can reach hidden joints, anchor points, net connections, and platform undersides. Set a written routine: quick daily checks for loose bolts, torn padding, debris, or blocked routes, plus scheduled inspections for wear and structural movement. Follow the equipment instructions, and have a competent person assess damage beyond routine tightening. After moving equipment or changing the floor surface, recheck clear widths and connections. Keep dated records, repair notes, and decisions to close an area. It is easy to inspect the exciting parts and miss a squeezed route beside the ball pit. Keep it clear.


 CONTACT NUMBER

 CONTACT NUMBER
 CONTACT NUMBER